The Ultimate Guide to Preparing Your Soil For New Sod
Laying new sod is one of the best ways to achieve a lush, green lawn quickly. However, the success of your sod installation largely depends on how well you prepare your soil. If you're on the hunt for the best sod contractors in Orlando, FL, look no further than From The Ground Up Landscaping. Our experts provide free estimates and exceptional service to ensure your new lawn thrives.
Why Proper Soil Preparation is Crucial
Before discussing the steps to prepare your soil, it's essential to understand why proper preparation is crucial. Poorly prepared soil can lead to uneven growth, weak root systems, and increased vulnerability to diseases and pests. By taking the time to prepare your soil thoroughly, you set a strong foundation for your new sod to flourish.
Step-by-Step Guide to Preparing Your Soil for New Sod
1. Assess Your Soil Type
First, determine what type of soil you have. Sandy, clay, and loamy soils each have their unique characteristics. Orlando, FL, typically has sandy soils, which drain quickly but may lack nutrients. Conduct a soil test to identify its pH level and nutrient content.
2. Remove Existing Vegetation
Clear the area of weeds, old grass, or any other vegetation. This can be done manually or with the help of a sod cutter or herbicide. Ensure that you remove the roots to prevent any regrowth.
3. Till the Soil
Use a rototiller to till the soil to a depth of 4 to 6 inches. This helps to loosen compacted soil, making it easier for the new sod's roots to penetrate and establish themselves.
4. Amend the Soil
Based on the results of your soil test, add the necessary soil amendments. Common amendments include:
- Compost for adding organic matter
- Lime to raise the pH of acidic soil
- Sulfur to lower the pH of alkaline soil
- Fertilizer to provide essential nutrients
Mix these amendments thoroughly into the tilled soil.
5. Level the Area
Use a rake to level the soil surface. Remove any rocks, debris, or clumps of soil. A smooth, even surface ensures that the sod will have good contact with the soil, promoting better root establishment.
6. Water the Soil
Water the prepared soil lightly but thoroughly about 24-48 hours before laying the sod. This ensures the soil is moist but not waterlogged, providing an ideal environment for the sod to root.
Choosing the Right Sod
Selecting the right type of sod is vital for a beautiful, long-lasting lawn. In Orlando, FL, some popular sod varieties include:
- St. Augustine Grass: Known for its lush texture and shade tolerance.
- Zoysia Grass: Offers excellent drought resistance and fine texture.
- Centipede Grass: Low-maintenance and performs well in sandy soils.
- Bahia Grass: Durable and drought-tolerant, ideal for large areas.
Your choice should depend on local climate conditions, soil type, and how much maintenance you're willing to provide.
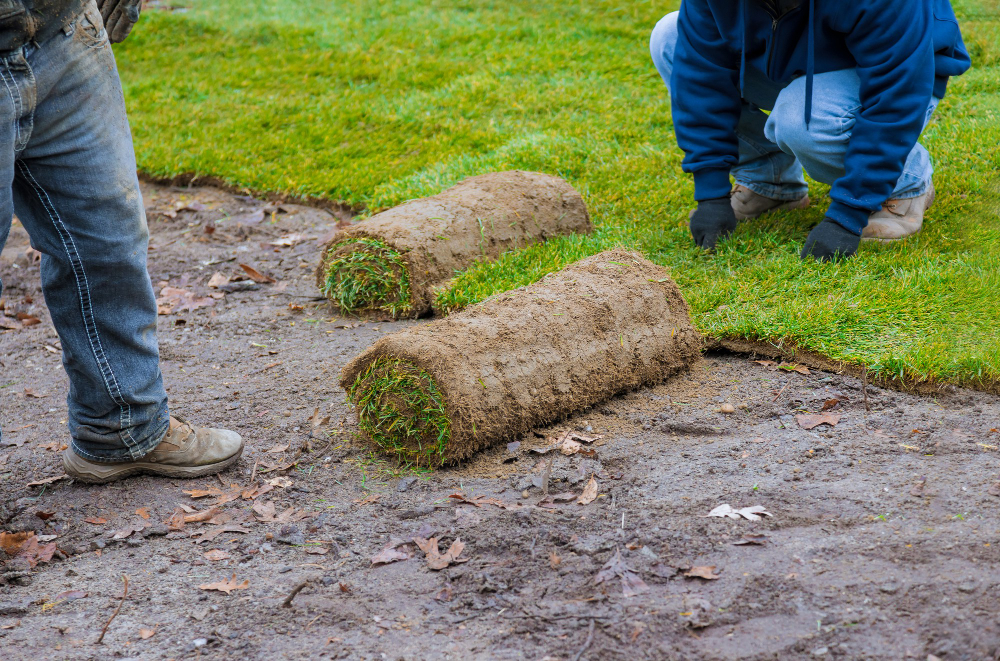
Laying the Sod
1. Start at the Edges
Begin by laying the sod along the longest straight edge, such as a driveway or sidewalk. This ensures a neat and even look.
2. Stagger the Joints
Lay the sod in a brick-like pattern, staggering the joints. This prevents seams from aligning, which can lead to gaps and poor root establishment.
3. Ensure Good Contact
Press the edges and joints of the sod strips tightly together to minimize gaps. Use a sod roller to press the sod firmly against the soil, ensuring good contact and eliminating air pockets.
Initial Watering and Care
1. Water Immediately
Water the newly laid sod immediately after installation. Ensure that the water penetrates the soil beneath the sod, reaching a depth of about 6 inches.
2. Water Regularly
For the first two weeks, water the sod daily to keep it moist. Gradually reduce the frequency while increasing the duration of each watering session to encourage deep root growth.
3. Avoid Heavy Foot Traffic
Try to keep foot traffic to a minimum for the first few weeks to allow the sod to establish properly. Limit activities such as mowing, playing, or setting up outdoor furniture during this period.
Long-Term Maintenance Tips
1. Mowing
Wait until the sod has rooted firmly before mowing, usually 2-3 weeks after installation. Set your mower to the highest setting and gradually lower it over subsequent mowings.
2. Fertilizing
Feed your lawn with a balanced fertilizer about 6 weeks after installation, following the recommendations from your soil test. Regular fertilization promotes healthy growth and resilience.
3. Weed Control
Keep an eye out for weeds and address them promptly. Hand-pulling or using a selective herbicide can help keep your lawn weed-free.
Why Choose From The Ground Up Landscaping?
If you're planning to lay new sod, why go through the hassle alone? From The Ground Up Landscaping, the leading sod contractors in Orlando, FL, offer free estimates and expert services to ensure your lawn is the envy of the neighborhood. Here's why you should choose us:
- Expertise: Years of experience and a team of skilled professionals.
- Quality: High-quality sod and soil amendments tailored to your lawn's needs.
- Convenience: Comprehensive services from soil preparation to sod installation and maintenance.
- Customer Satisfaction: A proven track record of satisfied customers.
Conclusion
Proper soil preparation is the foundation for a thriving, beautiful lawn. By following these steps and choosing the right sod, you'll create an outdoor space that you'll be proud to show off. And when you're ready to take the plunge, don't hesitate to contact From The Ground Up Landscaping. With our expertise and dedication, you can rest assured that your lawn is in good hands.
Ready to transform your lawn? Contact us today for a free estimate and get started on your lush, green oasis.